To troubleshoot Dometic AC control board wiring, first, check for loose connections or damaged wires. Ensure all connections are secure.
Proper wiring is crucial for efficient AC functionality. Good wiring practices can prevent potential issues and ensure proper AC operation for a comfortable indoor environment. By troubleshooting the control board wiring, you can identify and address any issues promptly, keeping your Dometic AC system running smoothly with optimal performance.
We will explore common wiring problems, how to troubleshoot them, and tips for maintaining your Dometic AC system for longevity and efficiency.
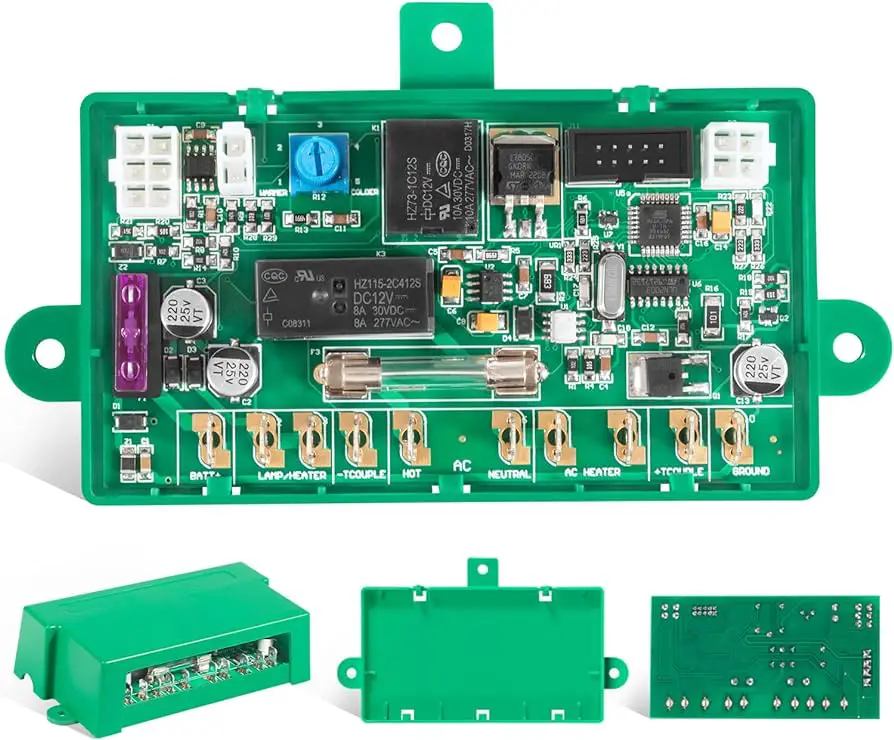

Credit: www.amazon.com
Common Issues
When troubleshooting Dometic AC control board wiring, common issues can arise that may affect the functionality of your cooling system. By identifying problems and following proper troubleshooting steps, you can resolve these issues efficiently.
Identifying Problems
- Check for any loose connections on the control board.
- Look for visible signs of damage or corrosion on the wiring.
- Inspect the control board for any burnt components.
- Ensure all wires are properly connected to their respective terminals.
Troubleshooting Steps
- Begin by turning off the power to the AC unit to prevent any electrical accidents.
- Use a multimeter to test the continuity of the wires and connections.
- Check the voltage output from the control board to ensure it’s within the normal range.
- Reset the control board by turning off the power, waiting for a few minutes, and then turning it back on.
- If the issue persists, consider consulting a professional technician for further assistance.
Tools Needed
To troubleshoot wiring issues with your Dometic AC control board, essential tools needed include a multimeter, wire cutters, and electrical tape. Ensure safety protocols are followed throughout the troubleshooting process for optimal results.
Essential Equipment
Before troubleshooting the Dometic AC control board wiring, gather the following tools:| Tools | Description |
|---|---|
| Multimeter | For checking electrical continuity and voltage levels. |
| Wire strippers | To safely strip wires for testing or repair. |
| Electrical tape | For insulating exposed wires and securing connections. |
| Screwdriver set | For removing panels and accessing the control board. |
Safety Precautions
- Shut off power to the AC unit before beginning any work.
- Wear insulated gloves to protect against electrical shocks.
- Ensure proper ventilation when working in tight spaces.
- Double-check all connections before restoring power.
Wiring Diagram
In understanding the wiring diagram of a Dometic AC control board, it’s essential to locate the control board and interpret the diagram accurately. This helps in troubleshooting and resolving any issues related to the wiring of the control board. Let’s delve into the specifics of the wiring diagram, including how to locate the control board and interpret the diagram effectively.
Locating The Control Board
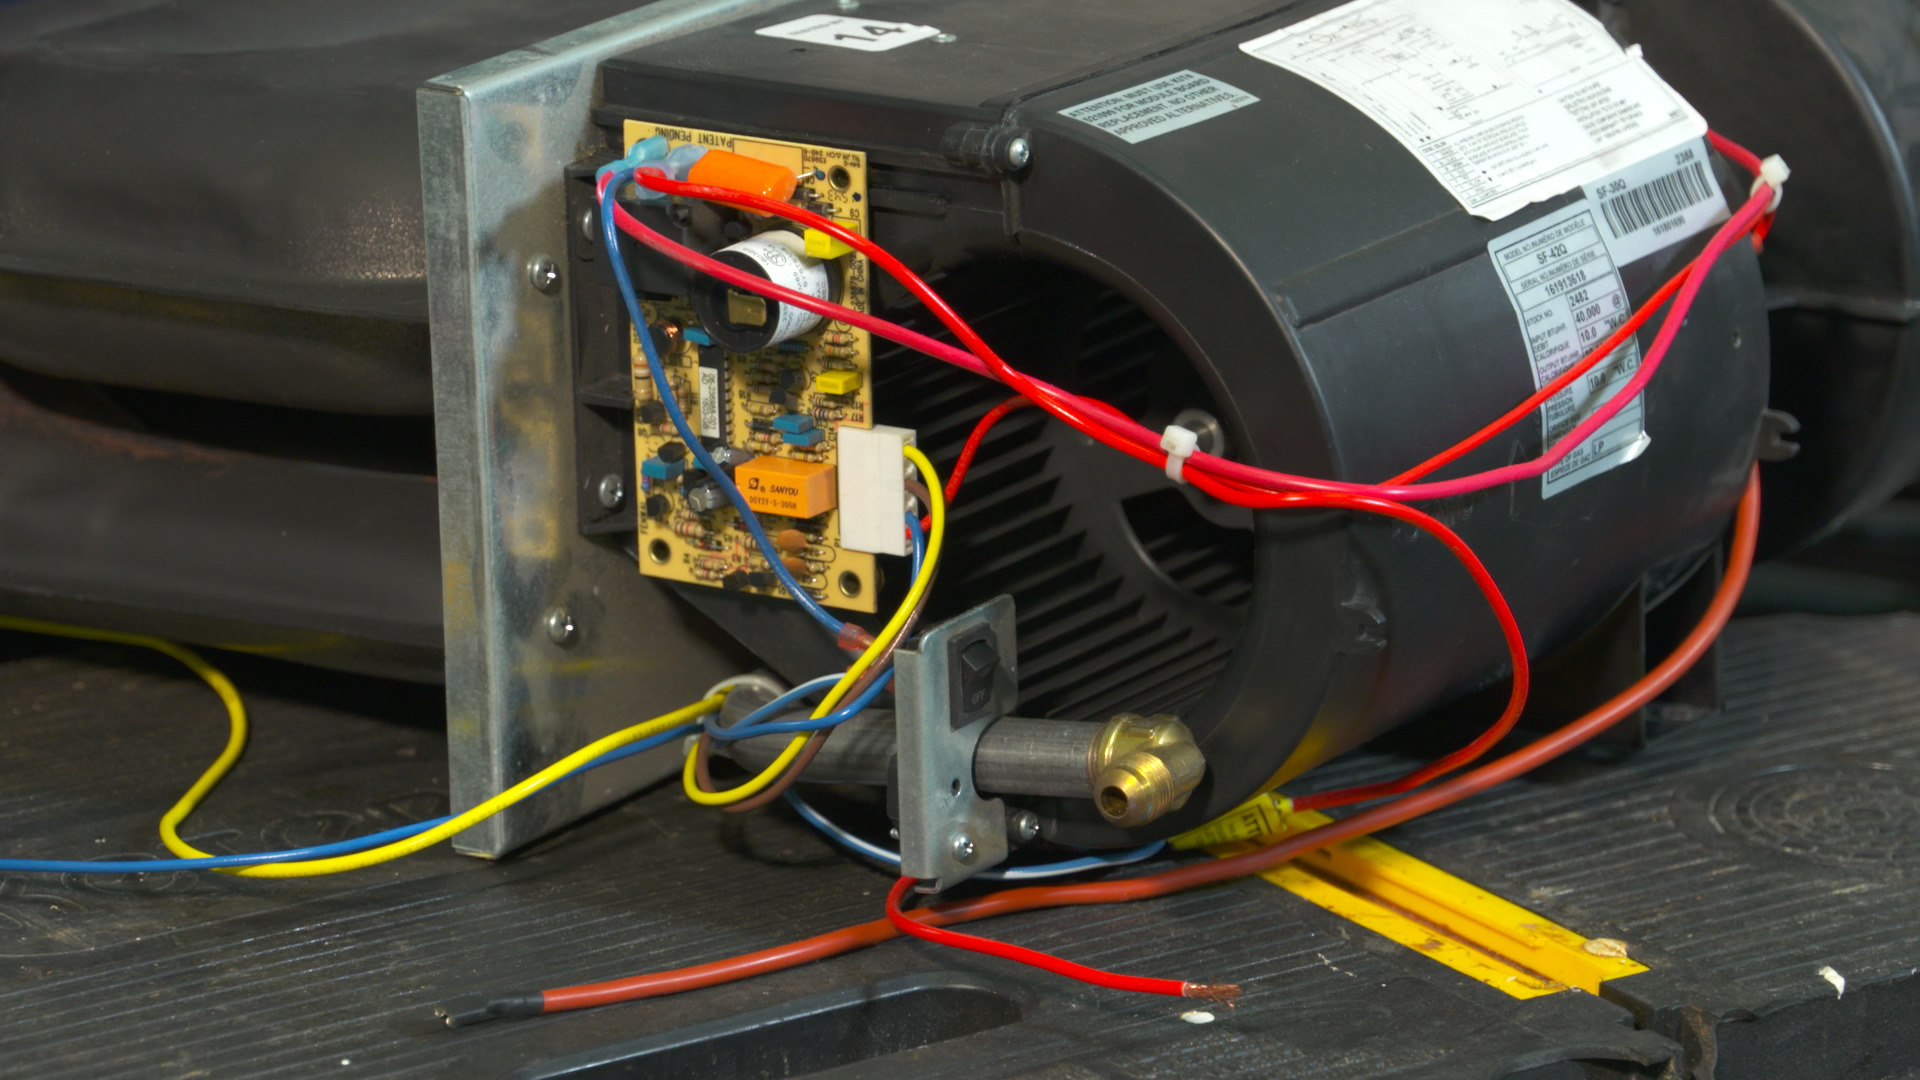
To troubleshoot the Dometic AC’s control board wiring, start by locating the control board. The control board is typically situated within the AC unit, often behind the front cover or access panel. It may also be found near the compressor or in an easily accessible area within the unit. Once located, ensure that the power supply to the AC unit is turned off before proceeding with any troubleshooting steps.
Interpreting The Diagram
The wiring diagram provides a visual representation of the electrical connections within the Dometic AC control board. It outlines the various components, terminals, and their corresponding wiring connections. When interpreting the diagram, carefully identify each component and terminal as per the legend provided. Pay close attention to the color-coding and labeling of the wires to accurately understand their connections and functions. This understanding will enable effective troubleshooting and diagnosing of any issues related to the control board’s wiring.
Testing Components
When troubleshooting your Dometic AC control board, it is essential to thoroughly test each component to identify any potential issues. Testing components such as capacitors, relays, thermistors, and sensors will help pinpoint the root cause of the problem and allow for accurate troubleshooting.
Capacitors And Relays
Capacitors and relays are critical components of the AC control board that regulate the electrical flow and ensure proper functioning of the unit. Testing these components can help identify any abnormalities or faults that may affect the performance of your Dometic AC system.
To test the capacitors, follow these steps:
- Turn off the power supply to the AC unit and discharge any stored electrical energy.
- Use a multimeter set to the capacitance testing mode.
- Disconnect the capacitor from the control board.
- Place the multimeter leads on the capacitor terminals, ensuring correct polarity.
- Read the capacitance value displayed on the multimeter. Compare it to the manufacturer’s specifications to determine if the capacitor is functioning correctly.
Relays, on the other hand, control the power flow within the AC system. Proper functioning of the relays is crucial for the overall operation of the unit. To test the relays:
- Switch off the power supply to the AC system.
- Locate the relays on the control board.
- Use a multimeter set to the continuity testing mode.
- Place one lead of the multimeter on the common terminal and the other lead on the normally closed (NC) terminal of the relay.
- If there is continuity between the two terminals, it indicates that the relay is functioning correctly. If there is no continuity, the relay may need to be replaced.
Thermistors And Sensors
Thermistors and sensors play a crucial role in maintaining the desired temperature and preventing overheating or freezing within the AC system. Testing these components will help determine if they are functioning as intended.
To test the thermistors and sensors:
- Ensure the power supply to the AC unit is turned off.
- Locate the thermistors and sensors on the control board.
- Use a multimeter set to the resistance testing mode.
- Connect the multimeter leads to the terminals of the thermistors and sensors.
- Read the resistance value on the multimeter display. Compare it to the manufacturer’s specifications to determine if the component is working correctly.
By systematically testing each component of your Dometic AC control board, you can identify any malfunctioning parts and take the necessary steps to rectify the issue. Remember to consult the manufacturer’s documentation or seek professional assistance if needed.
Fixing Techniques
When it comes to troubleshooting and fixing issues with your Dometic AC control board wiring, there are a few techniques that can help you get your system up and running smoothly again. In this section, we will look at two important fixing techniques: Repair vs. Replacement and Soldering Tips.
Repair Vs. Replacement:
When dealing with a malfunctioning AC control board, the first decision you need to make is whether to repair or replace it. Repairing the control board is often the more cost-effective option, as it allows you to fix the specific component that is causing the issue. However, if the control board is severely damaged or beyond repair, replacement may be the only viable solution.
Soldering Tips:
Soldering is a crucial skill when it comes to fixing electronic components like the AC control board wiring. It allows you to create strong electrical connections, ensuring a reliable repair. Here are some soldering tips to keep in mind:
- Prepare Your Workspace: Before you start soldering, make sure your workspace is clean, well-ventilated, and free from any flammable materials. Safety should always be a priority.
- Choose the Right Solder: Use a high-quality solder with a flux core, as it will make the soldering process easier and produce better results. The thickness of the solder should be suitable for the size of the component you are working on.
- Heat Control: Maintain the right temperature while soldering. If the temperature is too low, the solder may not flow properly, resulting in weak connections. If the temperature is too high, you risk damaging the components or causing them to overheat.
- Proper Technique: Hold the soldering iron at a slight angle and apply heat to both the component lead and the pad on the control board. Once the solder melts, apply it evenly and avoid excessive soldering, as it can create short circuits.
- Inspection: After soldering, inspect your work to ensure there are no bridges or cold solder joints. Use a magnifying glass if necessary to check for any defects that may interfere with the proper functioning of the control board.
By following these soldering tips, you can increase the chances of successfully repairing your Dometic AC control board wiring. Remember to take your time and work with precision, as it can make a significant difference in the overall performance and lifespan of your AC system.

Credit: 2manytoyz.com
Preventive Maintenance
Preventive maintenance is crucial to ensure the efficient functioning of your Dometic AC control board. By performing regular maintenance, you can prevent potential issues and extend the lifespan of your system. Here are essential steps for preventive maintenance to keep your Dometic AC control board in optimal condition:
Cleaning The Control Board
Regular cleaning of the control board is vital for avoiding dust buildup, which can lead to electrical issues. Use a soft brush or compressed air to gently remove accumulated dust and debris from the control board. Ensure that the AC power is disconnected before cleaning to prevent any electrical hazards.
Inspecting For Wear
Periodic inspections can help identify any signs of wear or damage to the control board. Look for loose connections, burnt components, or any visible damage that could hinder the board’s functionality. Tighten any loose connections and replace any damaged components to prevent potential malfunctions.
Credit: www.rvrepairclub.com
Frequently Asked Questions Of Dometic Ac Control Board Troubleshooting Wiring
How Can I Troubleshoot A Malfunctioning Dometic Ac Control Board?
To troubleshoot a malfunctioning Dometic AC control board, start by checking the power supply and wiring connections. Ensure that the AC unit is receiving power and that the wiring is intact. If all connections are secure, it may be necessary to reset the control board or replace it if it is faulty.
What Are The Common Signs Of A Faulty Control Board In A Dometic Ac?
Common signs of a faulty control board in a Dometic AC include the unit not turning on or not responding to commands, inconsistent temperature regulation, and display panel errors. If you notice these issues, it could indicate a problem with the control board that needs to be addressed.
Can I Fix The Wiring On A Dometic Ac Control Board Myself?
It is possible to fix the wiring on a Dometic AC control board yourself if you have the necessary knowledge and skills. However, it is important to exercise caution and follow the proper safety procedures. If you are unsure or uncomfortable with electrical work, it is best to consult a professional technician to handle the repairs.
How Much Does It Cost To Replace A Dometic Ac Control Board?
The cost of replacing a Dometic AC control board can vary depending on various factors such as the model of the AC unit and the location. On average, you can expect to pay between $100 to $300 for a new control board, not including the cost of installation or labor charges.
It is recommended to get a quote from a reputable technician or HVAC service provider for an accurate estimate.
Conclusion
Troubleshooting the wiring of your Dometic AC control board can be straightforward with the right tools and knowledge. By following the steps outlined in this blog post, you can successfully diagnose and resolve any issues with your unit’s control board.
Remember to prioritize safety and consult a professional if needed. Keep your AC running smoothly for a comfortable indoor environment.