To check hydraulic fluid on an RV, locate the reservoir tank and observe the fluid level and condition. Look for any leaks or contamination.
Maintaining the hydraulic fluid in your RV is crucial to ensure proper functioning of the system. Regularly checking the fluid level and quality can help prevent potential issues and prolong the lifespan of your RV’s hydraulic system. By following simple steps to inspect the hydraulic fluid, you can ensure a smooth and trouble-free experience while traveling in your RV.
Let’s explore the importance of checking hydraulic fluid on an RV and how to do it correctly to keep your vehicle in optimal condition.
- Importance Of Checking Hydraulic Fluid On Rv
- Tools And Equipment Needed
- Locating The Hydraulic Fluid Reservoir
- Preparing For Inspection
- Checking The Hydraulic Fluid Level
- Inspecting The Hydraulic Fluid Quality
- Addressing Common Issues
- Regular Maintenance Schedule
- Frequently Asked Questions Of How To Check Hydraulic Fluid On Rv
- Conclusion
Importance Of Checking Hydraulic Fluid On Rv
Checking the hydraulic fluid on your RV is crucial to ensure smooth operation and prevent potential damage. Learn how to properly check and maintain hydraulic fluid levels for optimal performance and longevity.
Avoid Costly Repairs
Ensure Safe And Efficient Operation
Checking hydraulic fluid on your RV is crucial to prevent costly repairs and ensure safe, efficient operation.
Avoid Costly Repairs
Regularly monitoring the hydraulic fluid levels helps in avoiding unexpected breakdowns.
- Leakage detection and prompt repairs
- Prevents system malfunctions
Ensure Safe And Efficient Operation
Maintaining the right fluid levels guarantees optimal performance while driving your RV.
- Enhances stability and control
- Prevents overheating of the hydraulic system
Tools And Equipment Needed
For successfully checking the hydraulic fluid on your RV, you will need specific tools and equipment to ensure accurate results and safety precautions. Below are the essential items that you should have on hand before starting the process:
Clean Rags
Clean rags are crucial for wiping any dirt or debris off the hydraulic fluid reservoir cap to prevent contamination.
Safety Gloves
Safety gloves protect your hands from any potential contact with hydraulic fluid, which can be harmful if it comes into direct contact with the skin.
Flashlight
Flashlight aids in illuminating the dark and tight spaces where the hydraulic fluid reservoir and dipstick are located.
Hydraulic Fluid Level Dipstick
Hydraulic fluid level dipstick is the primary tool used to check the fluid level accurately in the reservoir of your RV’s hydraulic system.
Locating The Hydraulic Fluid Reservoir
The hydraulic system in an RV is responsible for operating various components, such as leveling jacks, slide outs, and awnings. Regularly checking the hydraulic fluid levels is important to ensure everything is functioning properly. In this section, we will discuss how to locate the hydraulic fluid reservoir on your RV.
Refer To The Rv Owner’s Manual
Your RV owner’s manual is the best resource when it comes to locating the hydraulic fluid reservoir. The manual will provide specific details and diagrams that are unique to your RV model. Refer to the index or table of contents to find the section related to hydraulic systems or fluid reservoirs. This will give you a good starting point in your search.
Identify Common Locations
While the exact location may vary depending on your RV model, there are some common areas where the hydraulic fluid reservoir is often found. Here are a few places to check:
- Engine Compartment: In some RVs, the hydraulic fluid reservoir is located in the engine compartment, near the power steering pump or other hydraulic components.
- Basement Storage: Many motorhomes have the hydraulic fluid reservoir housed in a compartment within the basement storage area. Look for a labeled compartment or a panel that can be easily removed.
- Wheel Well: Some RVs have the hydraulic fluid reservoir mounted in the wheel well area. Check both the front and rear wheel wells for any visible signs of a reservoir.
If you are having trouble locating the hydraulic fluid reservoir, it is recommended to consult your RV owner’s manual or reach out to the manufacturer for assistance. They will be able to provide you with specific guidance based on your RV model.
Preparing For Inspection
Inspecting the hydraulic fluid on your RV is crucial for maintaining its proper function. Start by locating the hydraulic reservoir and check the fluid level using the dipstick. Look for any signs of contamination or leaks and top up the fluid if necessary to ensure smooth operation on the road.
Park Rv On Level Ground
Before checking the hydraulic fluid on your RV, ensure that the RV is parked on level ground to provide accurate readings. This minimizes the risk of the RV rolling or tipping during inspection.
Engage Parking Brake
With the RV parked on level ground, engage the parking brake to secure the vehicle in place and prevent any potential movement during the inspection process.
Turn Off Engine And Wait For It To Cool Down
Next, turn off the engine of the RV and allow it to cool down. This waiting period reduces the risk of potential burns or injuries during the inspection process.
Checking The Hydraulic Fluid Level
Are you ready to hit the open road with your RV? Before you embark on your next adventure, it’s essential to check the hydraulic fluid level to ensure your RV’s hydraulic system is in top condition. Keeping a close eye on the hydraulic fluid can prevent potential issues and keep your RV running smoothly. Here’s how to check the hydraulic fluid level in your RV.
Open Reservoir And Wipe Dipstick
To begin, locate the hydraulic reservoir in your RV. Make sure the RV is on a level surface to get an accurate reading. Open the reservoir and use a clean cloth or paper towel to wipe the dipstick clean to remove any residual fluid that could affect the reading.
Insert And Remove Dipstick
Insert the clean dipstick back into the reservoir until it’s fully seated, and then remove it once again. This will provide an accurate measurement of the hydraulic fluid level in the reservoir.
Inspect The Fluid Level
Once you have removed the dipstick, take a close look at the fluid level on the dipstick. The level should fall within the marked range on the dipstick, indicating that the hydraulic fluid is at an appropriate level. If the level is below the minimum mark, your RV may require additional hydraulic fluid.
Adding Or Topping Up Hydraulic Fluid
If the fluid level is below the minimum mark, it’s crucial to add or top up the hydraulic fluid as needed. Use the appropriate type of hydraulic fluid recommended by your RV manufacturer and carefully pour the fluid into the reservoir. Be cautious not to overfill the reservoir, as this can lead to issues with the hydraulic system.

Credit: www.utires.com
Inspecting The Hydraulic Fluid Quality
Check For Debris Or Contaminants
When inspecting the hydraulic fluid on your RV, it’s crucial to check for any debris or contaminants that may have found their way into the fluid system. This can include dirt, metal particles, or any other foreign matter that could potentially cause damage to the system. To perform this check, follow these steps:
- Start by cleaning the area around the hydraulic fluid reservoir to prevent any contaminants from entering the system.
- Next, remove the reservoir cap or access panel to gain access to the fluid.
- Using a clean cloth, check for any visible debris in the fluid. Look for particles or impurities that may have settled at the bottom of the reservoir.
- If you notice any significant debris, it’s essential to consult a professional or your RV manufacturer for further guidance.
Assess The Fluid Color And Consistency
The color and consistency of the hydraulic fluid can provide valuable insights into its quality and condition. By evaluating these factors, you can determine if the fluid needs to be replaced or if there are any underlying issues with the system. Here’s how you can assess the fluid color and consistency:
- Visually inspect the fluid’s color. Ideally, hydraulic fluid should have a translucent or slightly amber appearance. If the fluid is noticeably dark or murky, it may indicate the presence of contaminants or oxidation.
- Check the consistency of the fluid. It should have a smooth, consistent texture. If the fluid appears foamy or has a milky consistency, it may indicate the presence of air or moisture in the system.
- In case of any significant color or consistency abnormalities, it’s recommended to seek professional assistance to diagnose and resolve the issue.
Signs Of Moisture Or Foam
Moisture or foam within the hydraulic fluid can lead to reduced system performance and potentially cause damage to critical components. It’s important to be vigilant and identify any signs of moisture or foam by following these steps:
- Inspect the fluid for any visible signs of moisture, such as water droplets or a cloudy appearance. This could indicate a leak in the system or improper fluid management.
- Check for the presence of foam. Excessive foaming can occur due to air leaks or improper fluid levels, reducing the fluid’s ability to maintain optimal hydraulic pressure.
- If you detect any moisture or foam in the hydraulic fluid, it’s crucial to address the underlying issue promptly. Consult a professional for appropriate troubleshooting and repairs.
Addressing Common Issues
Addressing Common Issues:
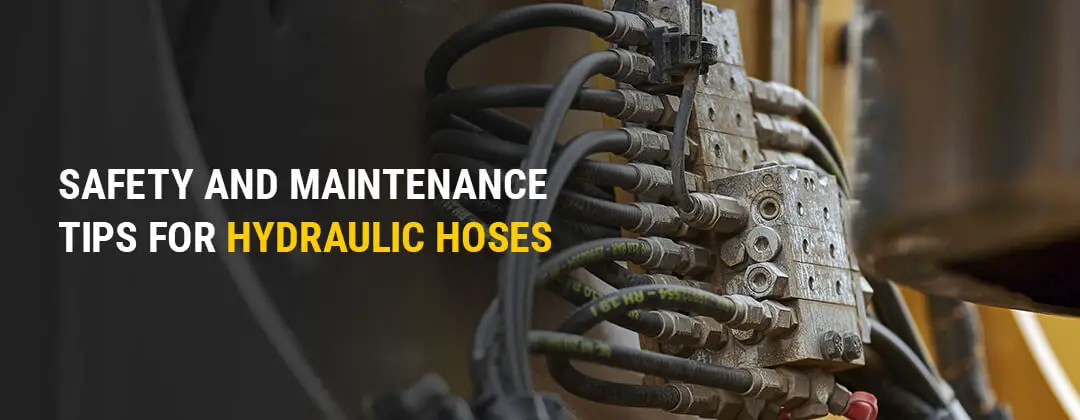
Fluid Leaks And Hoses Inspection
Check RV for any fluid leaks, especially around hydraulic hoses.
Inspect hoses for cracks, bulges, or soft spots to prevent leaks.
Ensure all connections are tight and secure to prevent hydraulic fluid loss.
| Common Signs of Fluid Leaks | Action |
|---|---|
| Puddles under the RV | Address leaks immediately. |
| Low fluid levels | Top up the hydraulic fluid. |
Bleeding The Hydraulic System
Bleeding removes air bubbles from the hydraulic system.
Follow the manufacturer’s guidelines for proper bleeding procedures.
Check fluid levels after bleeding to ensure optimal performance.
- Open bleeder valve to release air.
- Monitor fluid flow for any air bubbles.
- Close valve once pure fluid flows consistently.
Consulting A Professional Mechanic
If uncertain, seek professional assistance for hydraulic system concerns.
A mechanic can perform in-depth inspections and repairs when needed.
Regular maintenance by a professional ensures RV safety and efficiency.
Credit: www.gregorypoole.com
Regular Maintenance Schedule
When it comes to maintaining your RV’s hydraulic system, having a regular maintenance schedule is crucial. Regular checks of the hydraulic fluid ensure optimal performance and prevent potential issues.
Frequency Of Fluid Checks
Check hydraulic fluid levels every month or before long trips. Keep an eye out for any leaks or contamination.
Fluid Change And Filter Replacement
Change hydraulic fluid every 2 years or as recommended by the manufacturer. Replace filters annually to maintain system efficiency.

Credit: www.amazon.com
Frequently Asked Questions Of How To Check Hydraulic Fluid On Rv
How Do I Check The Hydraulic Fluid Level In My Rv?
To check the hydraulic fluid level in your RV, locate the reservoir, ensure the fluid is at the correct level, and look for any signs of leaks. Use the dipstick or sight glass to verify the fluid level and top up if necessary with the recommended fluid.
What Are The Signs Of Low Hydraulic Fluid In An Rv?
Low hydraulic fluid in an RV may manifest as difficulty in leveling the vehicle, noisy operation of the hydraulic system, or visible fluid leaks. If you notice any of these signs, it’s crucial to inspect and refill the hydraulic fluid to prevent damage to the system.
How Often Should I Check The Hydraulic Fluid In An Rv?
It’s recommended to check the hydraulic fluid in your RV at least once a month, especially before long trips. Regular checks ensure the system operates smoothly and helps to identify and address any potential issues early on.
Can I Use Any Hydraulic Fluid In My Rv’s System?
No, it’s essential to use the specific hydraulic fluid recommended by the RV manufacturer. Using the wrong type of fluid can result in damage to the hydraulic system and may void the warranty. Always refer to the RV’s manual for the correct fluid specifications.
Conclusion
To sum up, checking the hydraulic fluid on your RV is a crucial maintenance task that should not be overlooked. By following the step-by-step process outlined in this blog post, you can ensure the smooth operation of your RV’s hydraulic system and prevent potential issues down the road.
Regularly monitoring and maintaining the correct fluid levels will help extend the lifespan of your RV’s hydraulic components and enhance your overall camping experience. So, don’t delay, take the time to check your hydraulic fluid today!