To remove the Chevy heater hose quick connect, locate the release tabs and press them to disconnect. Removing a Chevy heater hose quick connect can be a straightforward process once you understand the steps involved.
By following a few simple instructions, you can easily detach the hose and complete the task efficiently. This guide will provide you with the necessary information to remove the Chevy heater hose quick connect with ease. Whether you are a seasoned mechanic or a DIY enthusiast, these steps will help you successfully disconnect the hose and carry out any necessary repairs or maintenance.
Let’s dive into the process of removing the Chevy heater hose quick connect to ensure smooth execution and avoid any potential complications.

Credit: www.autozone.com
Tools And Materials
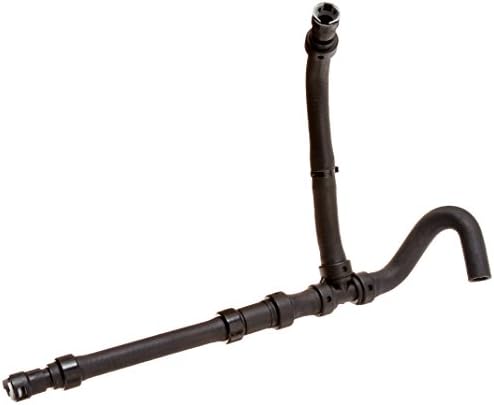
To remove the Chevy heater hose quick connect, you will need a few essential tools and materials such as pliers, a catch pan, and replacement hose clamps. These items will help you effectively detach and replace the hose without any hassle.
Necessary Tools
- Flathead screwdriver
- Needle-nose pliers
- Socket wrench with various sizes
- Adjustable wrench
Required Materials
- Replacement heater hose
- New hose clamps
- Rubber gloves
- Safety goggles
- Bucket for collecting coolant
When removing a Chevy heater hose quick connect, having the right tools and materials is essential to ensure a smooth and successful process.
With a few simple tools at your disposal, you can efficiently tackle this task without any hassle.
Before you begin, gather the necessary tools and materials listed below to make the process effortless and convenient.

Credit: www.amazon.com
Step-by-step Removal Process
To remove the Chevy heater hose quick connect, start by locating the hose and using a pair of pliers to compress the tabs. Once the tabs are compressed, carefully pull the hose away from the connector. Be sure to properly dispose of the old hose and follow the installation steps in reverse to complete the process.
Always consult the vehicle manual for specific instructions.
Step 1: Preparation
First, ensure engine is cool. Gather tools: gloves, safety glasses, pliers.Step 2: Access The Quick Connect Fitting
Locate heater hose connections. Identify quick connect fitting.Step 3: Release The Quick Connect Fitting
Depress the tabs on fitting. Pull hose firmly to disconnect.Step 4: Remove The Heater Hose
Twist hose gently to break seal. Pull hose to remove completely.Step 5: Inspect And Clean
Check for leaks or damage. Clean connections before reassembly. Removing the heater hose quick connect in your Chevy is a simple process that can be done in a few easy steps. Prepare the necessary tools and ensure safety measures are in place. Locate the quick connect fitting on the heater hose. Depress the tabs on the fitting and carefully detach the hose. Twist and pull the hose to remove it completely. Finally, inspect for any issues and clean the connections before reassembly.Precautions And Tips
When removing the Chevy heater hose quick connect, it’s essential to take certain precautions and arm yourself with some helpful tips. These measures can help you carry out the task smoothly and safely. Let’s delve into the key safety precautions and useful tips to aid you in this process.
Safety Precautions
- Always ensure the engine is cool before beginning the removal process to avoid burns or injury.
- Wear protective gloves and eyewear to shield yourself from potential hazards and prevent any contact with harmful substances.
- Relieve any built-up pressure in the cooling system by slowly loosening the radiator cap, provided the engine has cooled down.
- Place a suitable container beneath the connection point to catch any coolant that may spill during the removal.
- Handle coolant carefully, as it is toxic and harmful if ingested by humans and animals.
Helpful Tips
- Applying a lubricant or penetrating oil to the quick connect can ease the removal process, making it less challenging.
- Assess the condition of the hoses and connections for any signs of wear and tear, and consider replacing them if necessary to prevent future issues.
- Keep a rag or paper towels handy to wipe away any coolant spills and ensure a tidy work area.
- Document or take a photo of the hose connections before removal to aid in reinstallation and prevent confusion. Labeling the connections can also be beneficial.
- Exercise patience and caution during the removal process to avoid damaging any components and ensure a successful outcome.
Final Steps
Learn the final steps for successfully removing a Chevy heater hose quick connect with ease. Follow the detailed instructions to complete the task effectively. Master this process and handle it confidently on your own.
Replace The Heater Hose
Once you have successfully removed the Chevy heater hose quick connect, the next and final step is to replace the heater hose. Here’s how you can do it:
- Step 1: Inspect the old heater hose for any signs of damage or wear. If it appears to be deteriorated or leaking, it’s time to replace it.
- Step 2: Purchase a new heater hose that matches the specifications of your Chevy vehicle.
- Step 3: Before installing the new hose, apply a thin layer of lubricant to the ends to facilitate the connection process.
- Step 4: Align the new heater hose with the appropriate connectors and push it into place until you hear a clicking sound. This indicates that it is securely attached.
- Step 5: Double-check the connection to ensure that the new hose is tight and properly seated.
Test For Leaks
After replacing the heater hose, it’s important to test for any potential leaks. Follow these steps to ensure that everything is in working order:
- Step 1: Start your Chevy vehicle and let it run for a few minutes to allow the system to pressurize.
- Step 2: Carefully examine the connections and the surrounding area for any signs of coolant leakage.
- Step 3: Look for any drips, puddles, or wet spots that may indicate a leak.
- Step 4: If you notice any leaks, immediately turn off the engine and recheck the connection to ensure it is properly secured.
- Step 5: If there are no visible leaks, monitor the coolant level in the following days to ensure it remains stable.

Credit: knowhow.napaonline.com
Frequently Asked Questions On How To Remove Chevy Heater Hose Quick Connect
How Do I Remove A Chevy Heater Hose Quick Connect?
To remove a Chevy heater hose quick connect, locate the release tabs on both sides of the connector and press them simultaneously while pulling the hose away from the connector.
What Tools Do I Need To Remove A Chevy Heater Hose Quick Connect?
You’ll need a pair of pliers or a hose removal tool to remove a Chevy heater hose quick connect. Make sure they are sturdy and have a good grip for easier removal.
Can I Reuse A Chevy Heater Hose Quick Connect?
Yes, you can reuse a Chevy heater hose quick connect if it’s in good condition and not damaged. Just make sure to clean it properly before reinstalling it.
What Are The Common Problems With Chevy Heater Hose Quick Connects?
The common problems with Chevy heater hose quick connects include leaks, cracked or damaged connectors, and difficulty in disconnecting due to corrosion or debris buildup.
How Often Should I Check And Replace Chevy Heater Hose Quick Connects?
It’s recommended to check your Chevy heater hose quick connects regularly for signs of damage or leaks. If you notice any issues, replace them promptly to avoid any cooling system problems.
Conclusion
Removing the Chevy heater hose quick connect is a simple task that can be easily accomplished with a few basic tools and a systematic approach. By following the steps outlined in this guide, you can effectively remove the heater hose quick connect without the need for professional assistance.
With the right techniques and patience, you can successfully complete this task and ensure your vehicle’s heating system functions efficiently.