To replace an RV shower faucet without an access panel, you will need to remove the existing faucet and install a new one by accessing it from the wall or ceiling of the RV.
Credit: www.mrrooter.com
Preparing For The Replacement
Looking to replace an RV shower faucet without an access panel? Learn how to tackle this task, even without easy access, with our step-by-step guide.
Gather Necessary Tools And Materials
To successfully replace the RV shower faucet without an access panel, it is essential to gather the necessary tools and materials. Having everything you need at your fingertips will save you time and ensure a smooth replacement process.
Here is a list of tools and materials you will need:
- Adjustable wrench
- Screwdriver (Phillips and flathead)
- Plumber’s tape
- New RV shower faucet
- Gloves
- Towels or rags
Shut Off Water Supply
Prior to replacing the shower faucet, it is crucial to shut off the water supply. This will prevent any unnecessary water leakage or damage during the replacement process. Follow these steps to shut off the water supply:
- Locate the main water shut-off valve for your RV. This valve can typically be found in the utility compartment or near the water pump.
- Turn the valve clockwise to shut off the water supply. Make sure it is fully closed and no water is flowing.
Once the water supply is shut off, it is safe to begin the replacement process without the risk of water damage.
Credit: www.homedepot.com
Removing The Old Faucet
Replacing an RV shower faucet without an access panel allows for easy removal of the old faucet, enhancing the overall functionality and style of your RV bathroom. Enjoy a hassle-free process that saves time and effort.
If you want to replace your RV shower faucet without an access panel, the first step is removing the old faucet. This may seem like a daunting task, but with the right tools and a little know-how, you can get the job done. In this section, we will guide you through the process step by step, ensuring a smooth and successful removal of the old faucet. Let’s get started!
Locate And Remove The Cover Plate
To begin the process of removing the old faucet, you first need to locate and remove the cover plate. This plate is usually situated in the shower area, where the faucet joins the wall. Follow these simple steps to do so:
- Look for a small hole or indentation on top of the cover plate. This is where the access screw is typically located.
- Take a small flat-head screwdriver and insert it into the hole.
- Gently rotate the screwdriver counterclockwise to loosen the screw.
- Once the screw is loose, you can remove it completely.
- With the screw removed, use your fingers or a screwdriver to carefully pry off the cover plate.
Unscrew And Detach The Old Faucet
Now that the cover plate is removed, it’s time to unscrew and detach the old faucet. Follow these steps to complete this crucial task:
- Take note of the nuts securing the old faucet to the shower wall.
- Use a basin wrench or an adjustable wrench to loosen and unscrew these nuts. Ensure that you turn them counterclockwise.
- Once the nuts are loosened, you can detach the old faucet from the shower wall.
- Take extra care when removing the faucet to avoid damaging any surrounding fixtures or pipes.
Removing the old RV shower faucet without access panel may seem challenging, but by following these step-by-step instructions, you can easily and successfully remove the old faucet, preparing the way for installing a new one. Stay tuned for our next section on how to install a new RV shower faucet without an access panel!
Determining The New Faucet
To replace an RV shower faucet without access panel, the first step is determining the new faucet. This process involves choosing the right replacement faucet and ensuring a proper fit to avoid any installation issues down the line.
Choosing The Right Replacement Faucet
Consider the style and material of the new faucet. Look for a design that matches your RV’s aesthetic and a durable material to ensure longevity.
Ensuring Proper Fit
- Measure the dimensions of your current faucet to find a replacement that fits perfectly.
- Check for any specific requirements or compatibility issues with your RV plumbing system.
- Confirm that the new faucet has appropriate connections and fittings for an easy installation.
Installing The New Faucet
Installing the new faucet in your RV shower can seem like a daunting task, especially if you don’t have easy access to the back of the shower wall. However, with the right approach and some patience, it can be done without a problem. Read on to learn how to position and secure the new faucet correctly, and how to test the installation for leaks.
Positioning The New Faucet Correctly
When positioning the new faucet in your RV shower, it’s crucial to ensure it aligns perfectly with the existing water lines and connections. Take precise measurements and use a level to make sure the faucet is installed straight. This will help prevent any future leaks or issues with the water flow.
Securing And Testing The Installation
After positioning the new faucet in the right place, secure it tightly using the appropriate tools and hardware. Make sure all connections are properly sealed and tightened to prevent any water leaks. Once the faucet is securely in place, turn on the water supply and test for any leaks or irregularities in the water flow. Ensure that the hot and cold water handles are functioning correctly, allowing for smooth temperature adjustments.
Creating An Access Panel
Creating an access panel for replacing an RV shower faucet without an existing access panel is essential. This process will allow you to gain entry to the necessary plumbing components and make the replacement much easier.
Cutting An Opening For Access
To start, measure the area where the access panel will be installed. Use a pencil to mark the dimensions on the wall. Carefully cut out the marked area using a rotary tool or a handsaw. Ensure precision in the cut to avoid any damage to existing structures.
Installing And Securing The Access Panel
After cutting the opening, install the access panel frame. Cut a piece of plywood or drywall according to the dimensions of the opening, and attach it to the frame using screws. Ensure the panel is secure and flush with the wall.

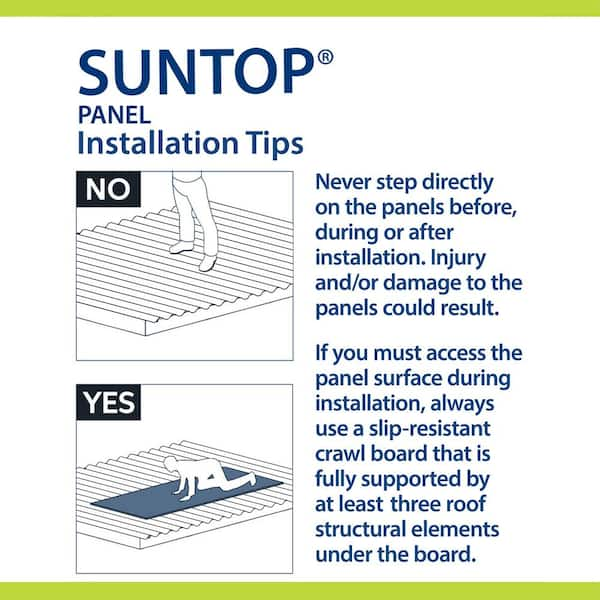
Credit: www.amazon.com
Final Steps
Ensure a seamless completion of the RV shower faucet replacement process by focusing on these essential final steps.
Sealing Gaps And Edges
- Check for any visible gaps around the new faucet.
- Apply waterproof silicone caulk to seal these gaps securely.
- Smooth the caulk with a damp cloth for a professional finish.
Restoring Water Supply
- Turn off the RV’s main water supply valve.
- Gradually reopen the valve to restore water flow to the shower.
- Check for leaks and tighten connections if needed.
Frequently Asked Questions Of Replacing Rv Shower Faucet Without Access Panel
How Can I Replace An Rv Shower Faucet Without An Access Panel?
To replace an RV shower faucet without an access panel, you can use an inspection camera to locate the connections or cut an access hole in the wall. Another method is to remove the shower surround for better access to the faucet.
What Tools Do I Need To Replace An Rv Shower Faucet Without An Access Panel?
You’ll need a pipe cutter, adjustable wrench, Teflon tape, and a new shower faucet. Depending on the method you choose for access, you may also need a drywall saw, screwdriver, or an inspection camera.
Can I Manage To Replace An Rv Shower Faucet Without Professional Help?
Yes, it’s possible to replace an RV shower faucet without professional help if you have the right tools and follow a step-by-step guide. However, if you’re uncomfortable with DIY work, it’s best to seek assistance from a professional to avoid causing damage.
Conclusion
Incorporating a new shower faucet without an access panel can be a challenging yet rewarding task. With the right tools, patience, and guidance, you can successfully upgrade your RV shower experience. Remember, proper maintenance is key to ensuring your RV components function optimally.
Happy RVing!