To create DIY homemade camper siding, consider using durable materials like aluminum or fiberglass for longevity. Additionally, ensure proper insulation for comfort and energy efficiency.
Design the siding to fit the camper’s shape and size, ensuring a snug and secure fit that will withstand the elements and provide a personalized touch to your camper. With the right materials and a bit of creativity, you can transform your camper with custom siding that meets your needs and style preferences.
Research different techniques and tutorials to find the best approach for your DIY camper siding project.
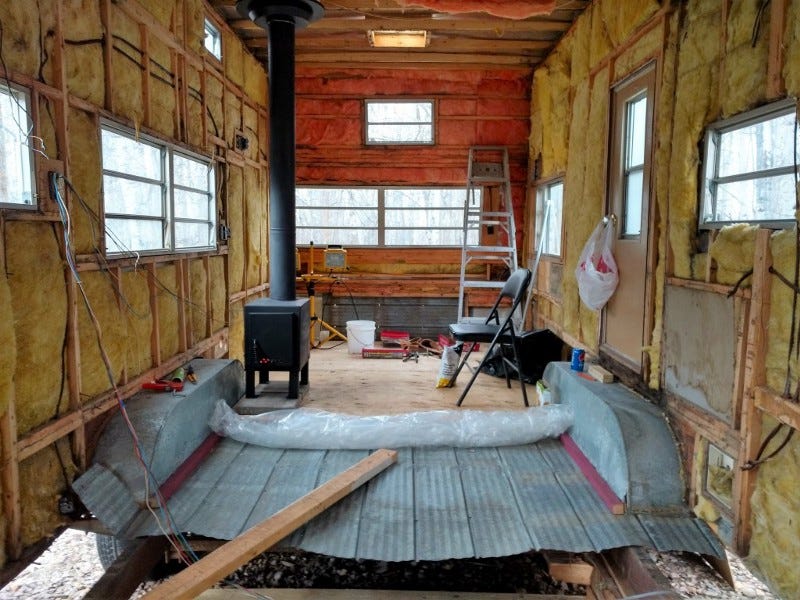
Credit: medium.com
- Choosing The Right Siding Material
- Painting Your Camper Exterior
- Installing Vinyl Siding On Your Camper
- Using Wood Paneling For A Rustic Look
- Creative Ways To Use Metal Sheets
- Fiber Cement Board: A Durable Option
- Adding Insulation To Your Camper Siding
- Finishing Touches And Accessories
- Frequently Asked Questions On Diy Homemade Camper Siding
- Conclusion
Choosing The Right Siding Material
Considerations For Camper Siding
When choosing the siding material for your DIY homemade camper, it’s crucial to consider factors like durability, weight, cost, and aesthetic appeal.
Pros And Cons Of Different Siding Materials
Let’s take a closer look at the various siding materials you can use for your camper:
| Siding Material | Pros | Cons |
|---|---|---|
| Fiberglass | Lightweight, durable, low maintenance | Can be expensive, prone to cracking |
| Wood | Natural look, customizable, eco-friendly | Requires more maintenance, can rot or warp |
| Aluminum | Lightweight, weather-resistant, easy to clean | Can dent easily, may require painting |
| Vinyl | Low cost, easy to install, variety of colors | Not as durable as other materials, can fade over time |
Painting Your Camper Exterior
Painting Your Camper Exterior
Your camper’s exterior is a canvas waiting to be transformed. Follow these steps to give your DIY homemade camper siding a fresh coat of paint.
Prepping The Surface For Painting
Clean the exterior thoroughly, sand any rough spots, and fill in any cracks or holes with putty. Mask off windows and trim to protect them from paint splatter.
Choosing The Right Paint
Select a high-quality exterior paint suitable for your camper’s material. Consider choosing a color that complements your design aesthetic.
Tips For A Professional Finish
- Apply multiple thin coats of paint instead of one thick layer to prevent drips and uneven coverage.
- Use a quality paintbrush or sprayer for a smooth application and professional finish.
- Allow each coat to dry completely before applying the next layer to avoid smudges or imperfections.
Installing Vinyl Siding On Your Camper
Adding vinyl siding to your camper is a great way to enhance its appearance and protect it from the elements. Vinyl siding is a popular choice due to its durability, versatility, and ease of installation. Whether you want to give your camper a fresh new look or provide it with an extra layer of protection, installing vinyl siding is an excellent DIY project that can be done with a few simple tools and materials.
Benefits Of Vinyl Siding
Vinyl siding offers numerous benefits for your camper. Some of the key advantages include:
- Durability: Vinyl siding is resistant to impact, scratches, and fading, ensuring that it will maintain its appearance for years to come.
- Low Maintenance: Once installed, vinyl siding requires minimal upkeep. It does not need to be painted, and it can be easily cleaned with a hose and mild detergent.
- Weather Resistance: Vinyl is designed to withstand extreme weather conditions, including high winds, heavy rain, and intense sunlight.
- Energy Efficiency: Vinyl siding can help to improve the insulation of your camper, reducing heat loss in the winter and heat gain in the summer, ultimately lowering your energy costs.
Preparing The Camper For Vinyl Siding
Before you begin installing vinyl siding on your camper, it is essential to properly prepare the surface. Follow these steps to ensure a smooth and successful installation:
- Clean the surface thoroughly to remove any dirt, grime, or previous coating. Use a pressure washer or a scrub brush and mild detergent to clean the camper.
- Inspect the camper for any signs of damage or rot. Repair or replace any damaged areas before proceeding with the installation.
- Remove any existing trim or accessories that may interfere with the installation of the vinyl siding.
- Apply a layer of waterproof sealant to any gaps or seams to prevent water intrusion.
- Finally, ensure that the camper’s surface is level and smooth, as this will facilitate the installation of the vinyl siding.
Step-by-step Installation Guide
Follow these step-by-step instructions to install vinyl siding on your camper:
| Step 1: | Cut the vinyl siding panels to fit the dimensions of your camper. Use a tape measure and a utility knife to make precise cuts. |
| Step 2: | Begin at the bottom of your camper and work your way up. Secure the first panel at the bottom using siding nails or screws. Ensure that it is level and plumb before moving on. |
| Step 3: | Overlap the subsequent panels, aligning the grooves and tongues. Nail or screw each panel securely into place. |
| Step 4: | Continue this process until you have covered the entire camper with vinyl siding. |
| Step 5: | Install the trim pieces around doors, windows, and corners to give your camper a polished look. |
| Step 6: | Inspect your work to ensure a tight fit and make any necessary adjustments or repairs. |
By following these simple steps, you can easily install vinyl siding on your camper, transforming its appearance and providing long-lasting protection. Enjoy the benefits of vinyl siding and give your camper a new lease on life!
Using Wood Paneling For A Rustic Look
When it comes to adding a rustic charm to your DIY homemade camper siding, using wood paneling can be a great choice. With its natural appeal and timeless aesthetic, wood paneling lends a warm and inviting atmosphere to your camper, evoking a sense of nostalgia and simplicity. In this section, we’ll explore the advantages of wood paneling, tips for selecting the right wood, and advice for installing wood paneling to achieve the perfect rustic look for your camper.
Advantages Of Wood Paneling
- Natural Aesthetic: Wood paneling brings the beauty of nature into your camper, creating a cozy and inviting atmosphere.
- Durability: High-quality wood paneling is durable and can withstand the rigors of outdoor travel.
- Insulation: Wood provides natural insulation, helping to regulate the temperature inside your camper.
- Versatility: Wood paneling comes in various finishes and can be customized to suit your desired aesthetic.
Selecting The Right Wood
When selecting wood for your camper siding, it’s important to consider the durability, weight, and aesthetic appeal of the wood. Opt for weather-resistant woods such as cedar or redwood for exterior panels, while lighter woods like pine or aspen can be used for interior paneling.
| Wood Type | Recommended Use |
|---|---|
| Cedar | Exterior Panels |
| Redwood | Exterior Panels |
| Pine | Interior Paneling |
| Aspen | Interior Paneling |
Tips For Installing Wood Paneling
- Prepare the Surface: Ensure the surface is clean, smooth, and free from moisture before installing the wood panels.
- Proper Sealing: Apply a weather-resistant sealant to protect the wood from the elements and prolong its lifespan.
- Allow for Expansion: Leave a small gap between panels to accommodate natural expansion and contraction of the wood.
- Regular Maintenance: Maintain the wood paneling by cleaning and resealing it periodically to ensure its longevity.
Creative Ways To Use Metal Sheets
Want to give your DIY homemade camper a unique and creative look? Metal sheets can be a fantastic option for adding a stylish touch to your camper siding. From providing durability to offering a modern aesthetic, metal sheets have become a popular choice among DIYers for camper siding. In this post, we’ll explore the benefits of using metal sheets, the types available for camper siding, and some innovative ideas for unique metal sheet designs that can elevate the appearance of your homemade camper.
Benefits Of Using Metal Sheets
Metal sheets bring a plethora of advantages to DIY homemade camper siding. They offer exceptional durability, providing long-lasting protection against weather elements. Additionally, metal sheets are lightweight, making them easy to work with during the installation process. With minimal maintenance requirements, metal sheets are a practical and cost-effective choice for camper siding.
Types Of Metal Sheets For Camper Siding
When it comes to choosing the right metal sheets for camper siding, there are various options available. Some popular choices include aluminum, galvanized steel, and corrugated metal sheets. Each type comes with its unique set of properties, such as strength, resistance to corrosion, and flexibility, allowing you to select the most suitable option for your DIY camper project.
Ideas For Unique Metal Sheet Designs
Thinking beyond conventional designs, there are numerous creative ways to utilize metal sheets for your homemade camper siding. Consider incorporating custom cutouts and patterns to add a personalized touch. Embracing mixed materials, such as combining metal sheets with wood or other textures, can create a visually striking effect. Additionally, experimenting with metal sheet painting or utilizing pre-finished metal sheets in distinctive colors can result in eye-catching camper siding designs that stand out.
Credit: www.extraspace.com
Fiber Cement Board: A Durable Option
Fiber cement board is a durable option for DIY homemade camper siding, offering long-lasting protection and strength. It is a practical choice that ensures the exterior of your camper stays intact for years to come.
Fiber Cement Board: A Durable Option When it comes to choosing the ideal siding material for your DIY homemade camper, durability is a top priority. That’s where fiber cement board comes in. Known for its exceptional strength and resistance to elements, fiber cement board offers an excellent option for camper siding. In this article, we will explore the advantages of fiber cement board, the preparation and installation process, as well as painting and maintaining this remarkable siding material. So, let’s delve into the world of fiber cement board and discover why it could be the perfect choice for your homemade camper.Advantages Of Fiber Cement Board
Fiber cement board possesses several advantages that make it a popular choice for camper siding. Here are the key advantages of utilizing fiber cement board:- Durability: Fiber cement board is renowned for its exceptional durability, making it resistant to wear and tear.
- Weather Resistance: This siding material can withstand various weather conditions, including extreme temperatures, rain, and strong winds.
- Insect and Rot Resistance: Unlike other siding options, fiber cement board is impervious to insects and rot, ensuring longevity and stability for your DIY camper.
- Fire Resistance: Made with a blend of cement, sand, and cellulose fibers, fiber cement board has excellent fire-resistant properties, providing you with peace of mind when camping in different locations.
- Low Maintenance: One of the many benefits of fiber cement board is its low maintenance requirements. With minimal upkeep, your camper siding will continue to look great for years to come.
Preparation And Installation Process
Preparing and installing fiber cement board as camper siding requires careful attention to detail. Here’s a step-by-step guide to help you through the process:- Measurement: Begin by measuring the dimensions of your camper to determine the amount of fiber cement board needed for your project.
- Cutting: Using a sharp carbide-tipped scoring tool, cut the fiber cement boards to the desired size. Take caution and wear protective gear during this step.
- Spacing: Leave small gaps, usually around 1/8 inch, between the boards to allow for expansion and contraction with temperature changes.
- Attachment: Secure the fiber cement boards to the camper’s exterior using corrosion-resistant screws or nails. Ensure they are properly fastened to provide stability.
- Sealing: Apply a high-quality sealant to the joints between the fiber cement boards to prevent water infiltration and maintain the integrity of your camper’s siding.
Painting And Maintaining Fiber Cement Board
Painting fiber cement board is a straightforward process that allows you to add a personal touch to your camper’s exterior. Follow these steps for a successful painting experience:- Cleaning: Before painting, ensure the fiber cement board is clean and free from any debris or dirt. Wash the surface using mild soap and water.
- Priming: Apply a primer suitable for cement-based surfaces to promote better paint adhesion and enhance the longevity of the paint.
- Painting: Use a high-quality exterior paint designed for fiber cement board. Apply at least two coats for optimal coverage and durability.
- Maintenance: To maintain the appearance and condition of your fiber cement board siding, inspect it regularly for any signs of damage or wear. Clean the surface annually and make any necessary repairs promptly.
Adding Insulation To Your Camper Siding
Importance Of Insulation In Campers
Insulating your camper enhances comfort, reduces energy consumption, and regulates interior temperature.
Different Insulation Materials
- Fiberglass: Lightweight, cost-effective, and widely used.
- Spray Foam: Excellent for filling gaps and providing superior thermal resistance.
- Rigid Foam: Offers high R-value and moisture resistance properties.
Proper Insulation Installation
Ensure proper sealing to prevent air leaks and consider moisture barriers for long-term protection.
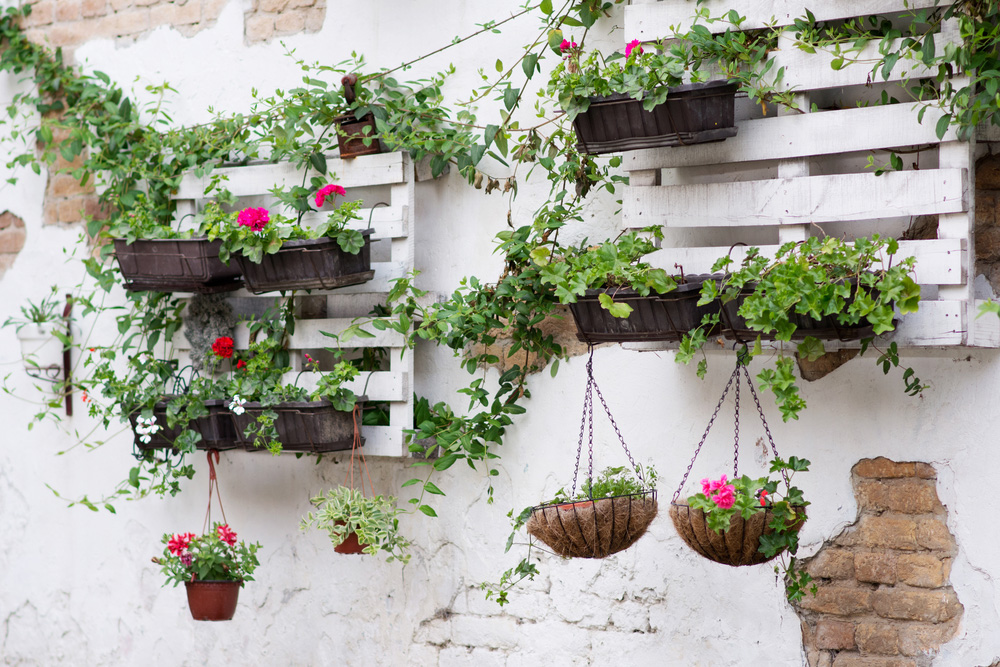
Finishing Touches And Accessories
Enhance your homemade camper siding with the perfect finishing touches and accessories. From colorful trim to sleek hardware, elevate the look and functionality of your DIY project with a range of options to personalize your camper. Enjoy the satisfaction of creating a unique and stylish space for your outdoor adventures.
Decorative Trim Options
Window And Door Enhancements
Practical Accessories For Camper Siding
Embark on enhancing your DIY homemade camper siding with a focus on Finishing Touches and Accessories.
Decorative Trim Options
Consider Decorative Trim Options to add a touch of style to your camper siding. Opt for sturdy materials like PVC or metal.
Window And Door Enhancements
Upgrade your camper’s appeal with Window and Door Enhancements. Install energy-efficient windows and secure doors for added safety.
Practical Accessories For Camper Siding
Enhance functionality with Practical Accessories for Camper Siding. Incorporate awnings, storage compartments, or solar panels for convenience.

Credit: www.pinterest.com
Frequently Asked Questions On Diy Homemade Camper Siding
What Are The Benefits Of Using Diy Homemade Camper Siding?
DIY homemade camper siding offers cost savings, customization, and a sense of accomplishment. It allows you to personalize your camper while being budget-friendly.
How Can I Choose The Right Materials For Homemade Camper Siding?
Consider factors such as durability, weight, insulation, and cost when selecting materials. Research different options to find the best fit for your DIY project.
What Tools Do I Need For Installing Homemade Camper Siding?
Essential tools include a saw, drill, level, tape measure, and safety equipment. Having the right tools ensures a smoother installation process for your camper siding.
What Maintenance Is Required For Diy Homemade Camper Siding?
Regular cleaning and inspections help maintain the appearance and integrity of your camper siding. Look out for signs of wear and damage to address promptly.
Conclusion
Revamping your camper with homemade siding is a cost-effective solution that adds a personal touch. By following the step-by-step process outlined in this blog post, you can achieve a professional-looking outcome without breaking the bank. Take advantage of easily accessible materials and let your creativity shine through.
Enhancing your camper’s aesthetic appeal has never been easier or more fulfilling. Start your DIY project today and turn your camper into the envy of the campground!